Body
Description
You can record directly into Panopto using the Panopto App (for Windows or Mac) from any location that uses the Panopto Activity or the TinyMCE editor (such as in a Forum or Assignment.)
This Guide Will Help You to:
-
Access Panopto through the TinyMCE editor in a forum
-
Record a video using Panopto Capture (Browser)
-
Insert Video Into the Forum
-
Seek Further Assistance
Access Panopto through the TinyMCE Editor in a Forum
For instructions on how to access Panopto through the TinyMCE Editor in a forum, please refer to the TigerTracks article How to Record or Add A Video in Panopto From Within a Forum [Student]
Record a video using Panopto for Windows or Mac
[Note: In order to download the Panopto for Windows or Mac application, you must have accessed Panopto through Moodle ISU. This will allow you to access the download page.]

-
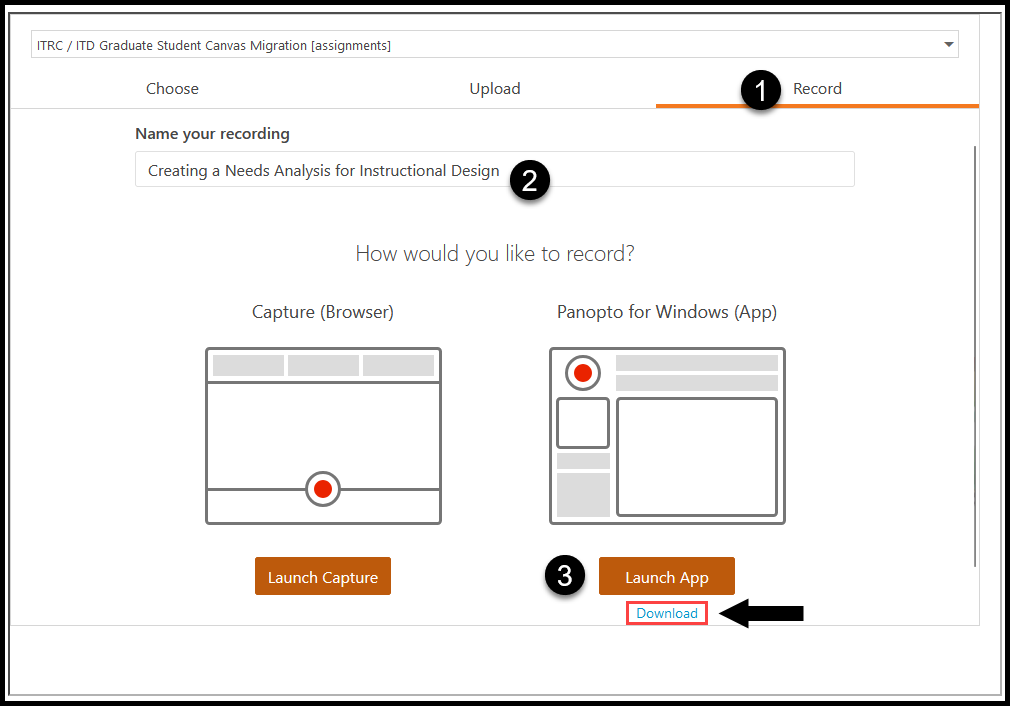
Select the Record tab.
-
Select Name your recording and enter a name.
-
Select Panopto for (Windows or Mac.)
-
If you have not previously installed the Panopto for (Windows or Mac) app, select the Download link.
[Note: You might need to scroll down in the window in order to see the Download link.]
-
Install the app, and then go back to Moodle ISU and select Launch App (3)
-
A pop-up window will appear, asking to allow https://isu.hosted.panopto.com to open the Panopto link with Panopto Recorder

-
Select Always allow and then Open Link
-
The Panopto App will then open a new screen

Select and change the following options:
-
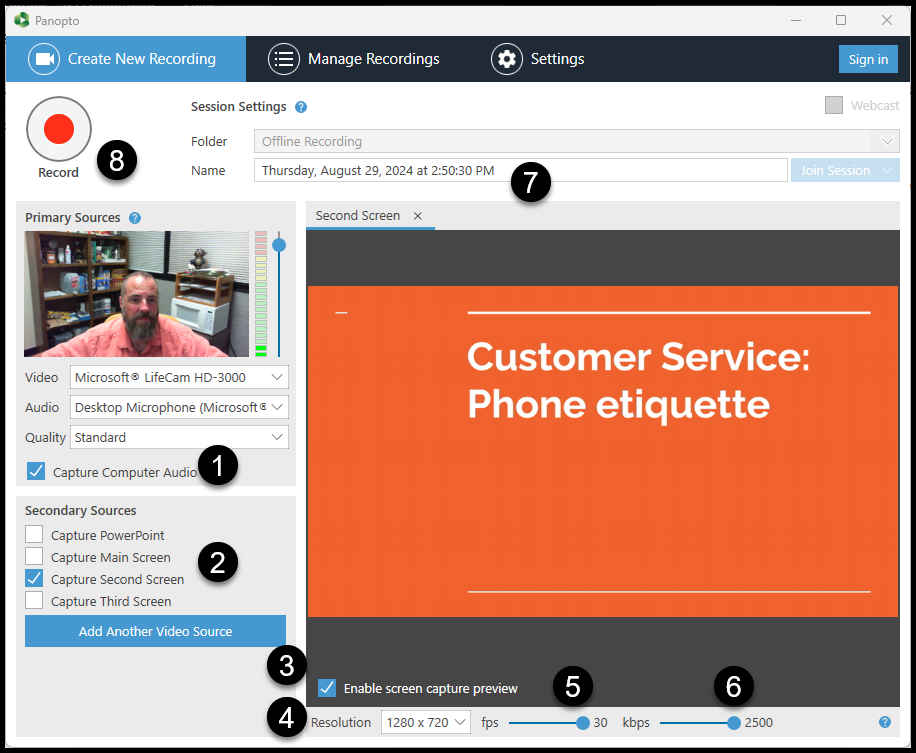
Select your microphone and select Capture Computer Audio (1)
-
Select any screens you want to capture, or your PowerPoint presentation (2)
-
Select Enable screen capture preview (3) in order to see what will be recorded from your screen.
-
Set your Resolution (4) to 1280 x 720 or higher, depending on the quality of your video you want recorded and the resolution of your webcam. Changing the resolution to a higher quality will create a larger file for you to upload.
-
Set your fps (frames per second) to 30 (5).
-
Set your kbps (kilobits per second) to 1500 (6).
-
Enter a name for your recording. This will default to the recording time, so make sure you change it to the correct name of your desired title.
-
Select Record to start recording.
-
After the recording has started, the Record button will change to Stop, and a Pause button will appear next to it.
-
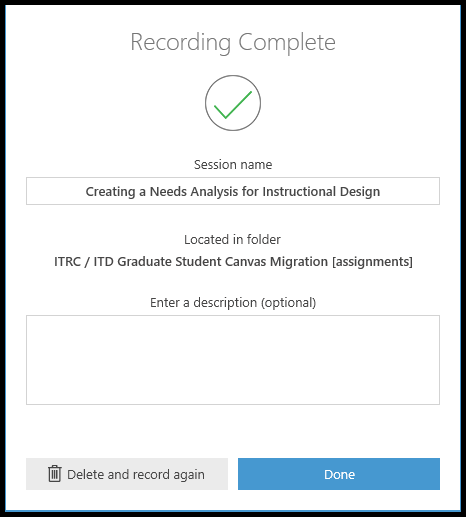
After you are finished recording, select Stop, and a new window will appear letting you know that the recording is complete. You can enter a description of the recording, and then select Done.
-

-
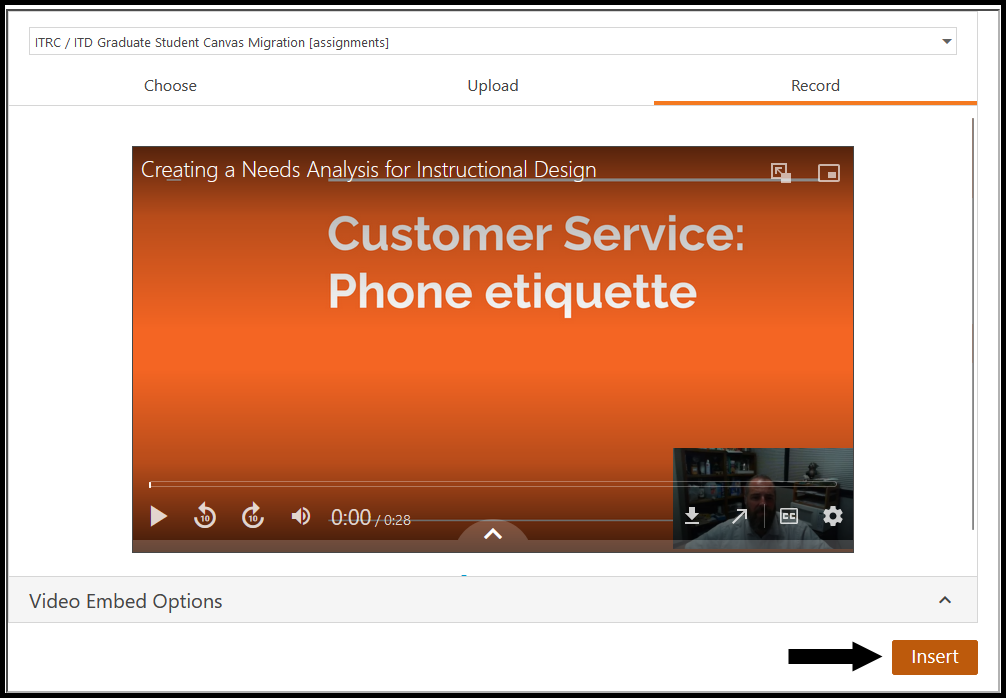
Your video will now appear in the Recording tab in Moodle ISU.
Insert Video Into the Forum or Assignment
After you finish recording your video, it is important to select Insert in the Add Panopto Video window in order to insert the video into your forum post or assignment. If you miss selecting Insert, your video will disappear, but if you go back in to edit your forum post, you can select Insert on the video to add it to your post.

After your video is inserted into the forum post, select Post to forum and your post and video will be available after 30 minutes.
Seek Further Assistance
For additional assistance, please contact the ITRC at (208) 282-5880 or itrc@isu.edu.
For more information, please visit Panopto Support :

This work was created by the Idaho State University Instructional Technology Resource Center and is licensed under a Creative Commons Attribution-NonCommercial 4.0 International License.