Body
Description
The Accessibility+ Toolkit provides you (faculty) the opportunity to assess your course against a set of technical standards for accessibility. The reports, guides, and wizards help you easily identify and bulk fix reported errors.
This Guide Will Help You to:
Describe the Areas Assessed by the Accessibility+ Toolkit
The Accessibility+ Toolkit assesses the HTML in your Moodle ISU course. This includes all the text you add directly into Moodle ISU in section headers, labels, pages, books, lessons, questions, descriptions, etc. The Accessibility+ Toolkit does not check the accessibility of files you upload to Moodle ISU such as PDFs, Word, PowerPoint, etc.
The following types of errors are assessed:
-
Image
-
Layout
-
Link
-
Plain, concise, and meaningful language is used in place of long URLs.
-
Unique language for each link.
-
Users are warned and given a choice if a link opens in a new window.
-
No broken links.
-
Media
-
Table
-
Simplify complex tables by breaking them into smaller tables.
-
Tables are used to organize tabular data, with one item per cell.
-
Use captions.
-
Designate header rows and columns.
-
Text
-
All caps are only used for acronyms, logos, etc.
-
Bold and italics use the updated HTML tags.
-
Alignment of text is consistent.
-
Long text blocks are avoided to improve readability.
Add the Accessibility+ Toolkit Block
The Accessibility+ Toolkit block provides an overview of the accessibility errors in your course along with a guide for each type of error.
-
Turn Editing On.

-
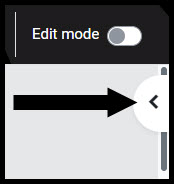
Open the Block drawer.

-
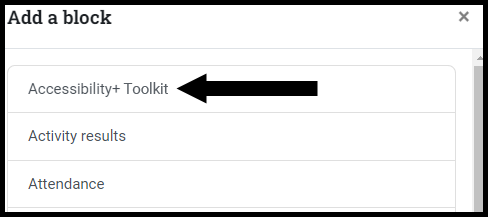
Select Add a Block from the Block drawer.

-
Select Accessibility+ Toolkit.

-
The block will be added to the Block drawer.

[Note: Students will not be able to see the Accessibility+ Toolkit block.]
Identify the Information Provided in the Accessibility+ Toolkit Block
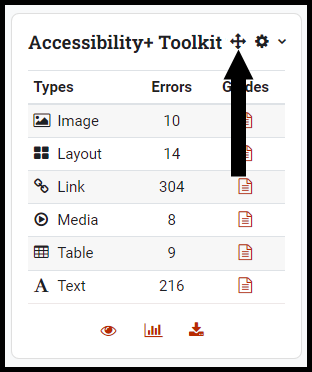
The Accessibility+ Toolkit Block provides a quick overview of the errors found in your course; guidance on how to best prevent the errors; and access to the detailed reports, wizards, and the course content highlighting.
In the table shown in the Accessibility+ toolkit you have three columns with an error type, number of errors, and a guide in each row.

In the example above you can see there are 340 errors related to Text. Selecting the guide will provide you with information about how to avoid future errors when creating text.
The least amount of errors found in this course are related to Media. This would mean that either there is very little media in the course or the instructor has done better at incorporating accessibility in the creation and addition of media to the course.
The three icons at the bottom of the Accessibility+ Toolkit block provide the following access:
-
The eye  will turn on and off the course content highlighting.
-
The chart  will open the Report and Wizard menus.
-
The down arrow  will download a copy of the Summary report.
[Note: Alternatively you can access the Accessibility+ Toolkit Reports and Wizards through the actions menu (the gear) on the main course page.]
Explain the Course Content Highlighting
The course content highlighting shows the accessibility status on the main course page.
You will see indications of passed (green outline), failed (red outline), and failed with limited errors (yellow outline).

In the example above, you can see that the Start Here page has limited errors, the Announcements and Academic Exchange forums passed, and the Syllabus and Course Overview failed.
With this information you can prioritize the fixes. Bulk fixes can be done using the Wizards.
Seek Further Assistance
For additional assistance, please contact the ITRC at (208) 282-5880 or itrc@isu.edu.

This work was created by the Idaho State University Instructional Technology Resource Center and is licensed under a Creative Commons Attribution-NonCommercial 4.0 International License.