Description
The Accessibility+ Toolkit includes wizards designed to allow you to submit error fixes in bulk to increase the efficiency and reduce the pressure of creating an accessible course. Each wizard page displays proposed changes, some of which could be static text (text that you cannot edit) while others have input boxes for you to edit your own text, depending on the nature of the error.
This Guide Will Help You to:
-
Navigate to the bulk fix wizards
-
Identify the location and purpose of the different wizards
-
Use bulk fixing in the wizards
-
Seek further assistance
Navigate to the bulk fix wizards
You can navigate to the wizards through the Accessibility+ Toolkit block or through the settings gear menu.
Through the Accessibility+ Toolkit block
-
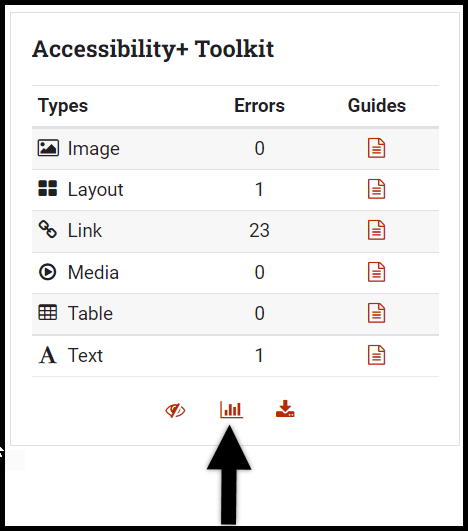
Locate the Accessibility+ Toolkit block.
-
If you do not see the Accessibility+ Toolkit Block you may need to add it to your course. See Accessibility+ Toolkit in Moodle ISU: Overview
-
Select View Accessibility+ Report which is represented by the bar graph icon at the bottom of the Accessibility+ Toolkit block. This will take you to the Accessibility+ Report page.
-
Select the Go to wizards button.

Through the course menu
-
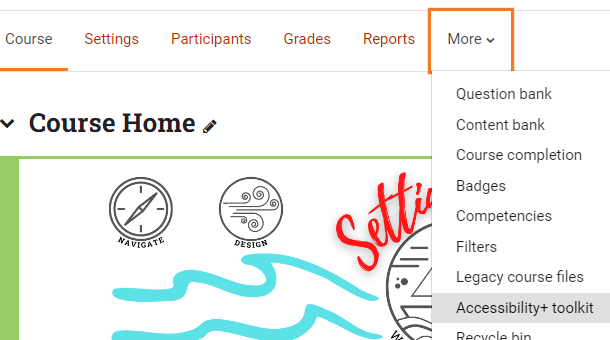
From the course navigation menu, select More
-
Select Accessibility+ Toolkit from the drop-down menu.
-
Select the Go to wizards button.
Identify the location and purpose of the different wizards
There are nine tabs on the wizards page. The tabs are briefly described below:

-
Error list
-
When you first open the wizards page, the Error list tab will be selected. This page shows a list of all the errors that were detected in the course. It also includes an Edit column that when selected will take you directly to the editing page for that specific activity or resource to allow you to manually edit each item.
-
Fix all caps
-
Fix bold
-
Fix image alt text
-
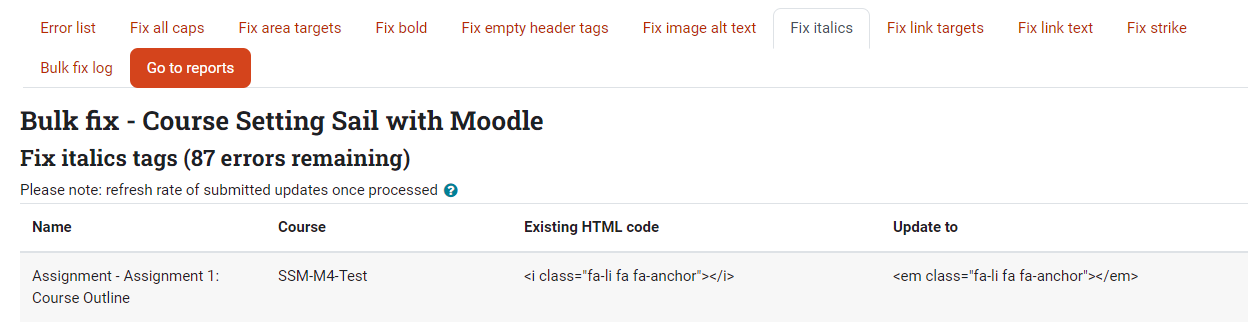
Fix italics
-
Fix link text
-
This tab allows you to review URLs that use inaccessible link text, such as “Click here”, which does not provide context, or the URL, which creates a poor experience for users who listen to the URL instead of viewing it. This wizard suggests alternatives, based on the retrieved title of the URL, but can also be customized.
-
Fix strike
-
Fix area targets
-
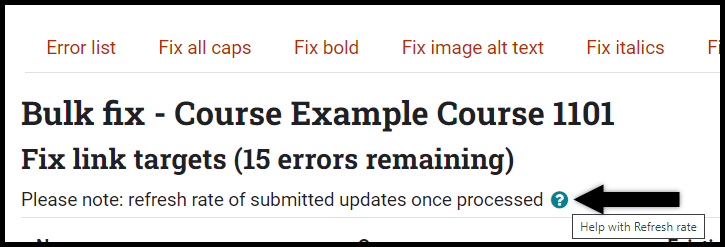
Fix link targets
Use bulk fixing in the wizards
Once you are on the wizards page, select the tab containing errors you want to fix. The examples below demonstrate the difference between using the static text and input box wizards.
[Note: Before you begin, ensure you are on the wizards page. If you are not, refer to the Navigate to the bulk fix wizards section above.]
Example 1: Fix bold (static text)
The following wizards display static text (that cannot be edited) to automatically update the text formatting to accessibility standards.
-
Fix bold
-
Fix italics
-
Fix strike
-
Fix area targets
-
Fix link targets
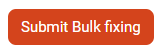
You will just need to scan the list and select the Submit Bulk fixing button. No input from you is required.
-
The Fix bold tab lists bold text in the course that does not use the appropriate HTML tag (<strong>).
-
The Existing HTML code column displays the bold text using the <b> tag.
-
The Update to column displays the suggested fix (<strong> tag). Note that the suggested fix is static text that cannot be edited.
-
To update the bold text to the appropriate HTML tag, scroll to the bottom of the page and select the Submit Bulk fixing button.
[Note: The Submit Bulk fixing button submits all the errors displayed on the current page. It does not submit errors on additional pages. This means that the “Submit Bulk fixing” button will need to be selected on each page within that tab after the displayed errors have been reviewed as needed.]
-
If there is more than one page of errors listed in the tab, make sure to go to the next page to submit the errors on that specific page for fixing.

[Note: Once you submit bulk fixing for a page, it is important to note that the refresh rate of submitted fixes inside the error list and individual wizard tabs can vary once a fix is processed. More information regarding this can be found inside any of the wizard tabs by selecting the Help with refresh rate question mark icon.]
Example 2: Fix link text (input boxes)
Some wizards have input boxes where you can edit the text. The following wizards have input boxes:
-
Fill all caps
-
Fix image alt text
-
Fix link text
For these wizards, you can review the list of errors and make edits as necessary in the input boxes before selecting the Submit Bulk fixing button.
-
The Fix link text tab lists any URLs detected as using inaccessible link text.
-
The Existing HTML code column displays the current link text along with the link URL.
-
The Update to column displays the suggested alternative for the link text based on the retrieved title of the URL. Note that the suggested alternative is located inside an input box that allows you to customize the suggested text.
-
Review each error and the corresponding suggested alternative text.
-
If you want to use the suggested text, review the next error.
-
If you do not want to use the suggested text, select inside the input box of a specific error to edit it.

-
Repeat step 1 until all the errors displayed on the current page have been reviewed and/or edited.
-
Once you are satisfied with the text in the Update to column, scroll to the bottom of the page and select the Submit bulk fixing button to submit the suggested fixes displayed on the current page.
-
If there is more than one page of errors listed in the tab, make sure to go to the next page to review and/or edit the suggested fixes on that specific page and submit them for fixing.
Seek further assistance
For additional assistance, please contact the ITRC at (208) 282-5880 or itrc@isu.edu.

This work was created by the Idaho State University Instructional Technology Resource Center and is licensed under a Creative Commons Attribution-NonCommercial 4.0 International License.