Loom is a video recording tool that helps you instantly create shareable videos. With Loom, you can record your camera, microphone, and desktop simultaneously to create narrated presentations or how-to videos. Loom is free for educators and students.
This Guide Will Help You:
-
Setup account
-
Start recording
-
Operate screencast
-
Manage recordings
Setup account
-
Go to loom.com/signup, sign-in with your ISU gmail.
-
Agree to terms and conditions.
-
Select either Teacher or Student, click continue
-
For Mac/PC click install app, For Chromebooks click install extension.
-
Click Continue button
-
You will be redirected to your Loom My Videos folder.
Note: for education accounts, You should see the following message: “As a verified teacher or student we have applied a 100% discount to your Loom Pro subscription.
Start recording
Desktop app
-
On your desktop open the Loom application.
-
Choose either to record:
-
Screen and Webcam
-
Screen only
-
Cam only
-
Select the video source from the video dropdown.
-
Select audio source from the mic dropdown.
-
To configure your camera view, click on the video thumbnail (you will see the following options:

-
Turn off the thumbnail.
-
Change thumbnail size to Small.
-
Change thumbnail size to Big.
-
Change thumbnail size to full screen.
-
Change thumbnail from Profile picture to Video feed.
-
To position the thumbnail, click and drag the thumbnail to the desired location.
-
Click Start Recording
-
You’ll see a visible countdown, you’ll also hear a ding when the recording has started.
Chrome extension
-
In the Chrome browser, open the Loom Chrome extension
-
Choose either to record:
-
Screen and Webcam
-
Screen only
-
Cam only
-
Click Show advanced options
-
Select the video source from the video dropdown.
-
Select audio source from the mic dropdown.
-
To configure your camera view, click on the video thumbnail; you will see the following options:

-
Turn off the thumbnail
-
Change thumbnail size to Small
-
Change thumbnail size to Medium
-
Change thumbnail size to large
-
Add camera effects
-
Finish recording
-
Restart recording
-
Pause recording
-
Cancel recording
-
Click Start Recording
-
You’ll see a visible countdown, you’ll also hear a ding when the recording has started.
Operate Screencast
During the screencast, you can continue to move the thumbnail to not cover up specific content.
To the right of the screen you have the following tools:

-
Stop recording
-
Redo recording
-
Pause recording
-
Delete recording
-
Annotate recording
Note that when the Annotate recording is select you can select both the color of the ink and the size of the brush. After you draw an annotation it will disappear from view within a few seconds.

After you have completed your recording, you can click the Stop recording button.
Manage Recordings
Your recordings will be stored in your Loom account at Loom.com/my-videos
It will have an interface comparable to YouTube:

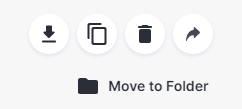
You can down download an .mp4, duplicate, delete, share, and organize your video.
You can easily change the title of your video, by clicking on the title and typing your new title:

There is also the option to edit your video:

-
Settings: allow comments, email notifications, show analytics, and more.
-
Custom thumbnails: create an image and upload to become the thumbnail of your video
-
Trim: remove the beginning, middle, and end segments from the final video.
-
Call-to-Action: After viewers have watched to can designate a link to that you want viewers to go to.
Lastly similar to YouTube and Google drive, you can control privacy:

Share recording to Moodle
Users are not required to use the Loom Video Recorder to share their Loom videos in Moodle ISU.
-
Go to Loom.com and sign into your account.
-
Find the desired video and copy your Loom video’s URL.
-
In the Moodle HTML editor, paste the URL.
Note: When changes are saved, the url will automatically embed as a video. If a link with display text is desired please see, Create a contextualized hyperlink.
-
Select Save changes.
Create Contextualized Hyperlinks
-
Highlight the URL and select the Link button.
-
Move the Loom URL to “Enter a URL” field and type the display name in the “Text to display” field.
-
Select Create link.