Description
The Wiki tool in Moodle ISU can be used as a learning resource. A Wiki is a dynamic web-resource, designed to allow every member of a community (such as a class) to edit and alter its contents in order to reflect the body of knowledge and understanding collected by the community.
This Guide Will Help You to:
-
Identify common features of a wiki in Moodle ISU
-
View a wiki
-
Edit an existing wiki page
-
Create a new page in a wiki
-
View relationship between wiki pages
-
View wiki page history
-
Seek further assistance
Identify common features of a wiki in Moodle ISU
The Moodle ISU Wiki module enables students to collaborate on a book-like writing project. The Wiki is easy to use, interactive, and organized by date, so it encourages informal discussion among the participants. A Wiki is a powerful tool which can be used to record the progress of the students. Old versions of a Wiki are never deleted and can be restored. Wikis can also be searched, just like other course material.
Note: The instructor determines who can view and edit the wiki. Depending on the settings chosen, editing and viewing settings can be determined separately for the whole class, the instructor, individual groups, or an individual student.
View a Wiki
-
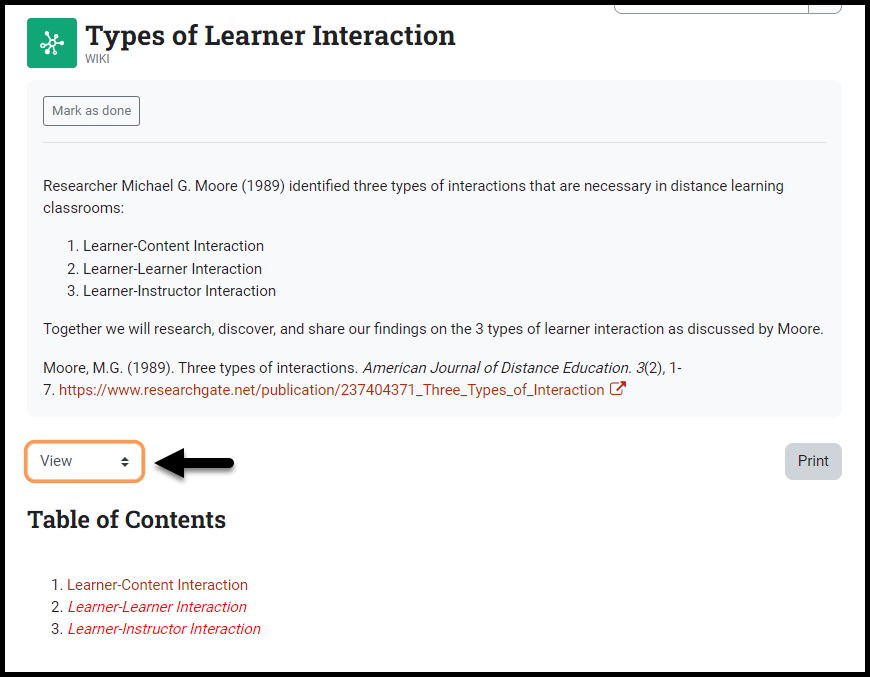
Select the name of the wiki you would like to view

-
With the view option selected, the contents of the wiki will display.
Edit an existing wiki page
-
Select the name of the wiki you would like to edit.
-
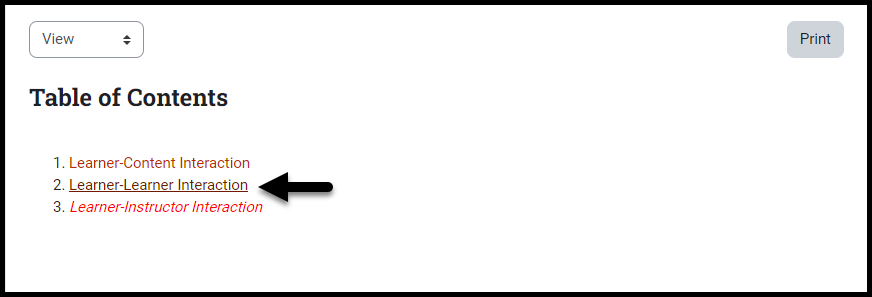
Select the page that needs to be edited.
-
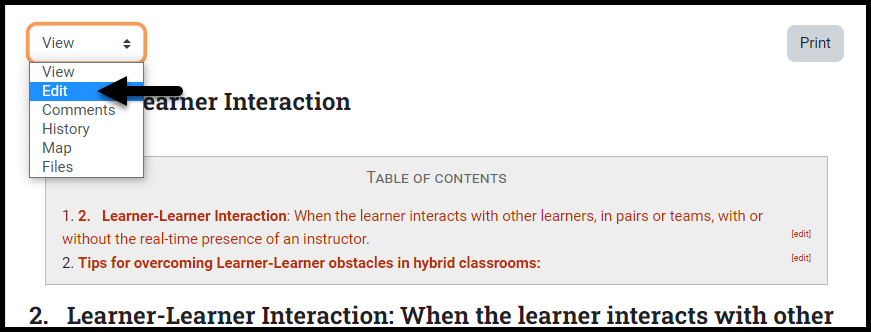
At the top of the Wiki page, select the Edit option.
-
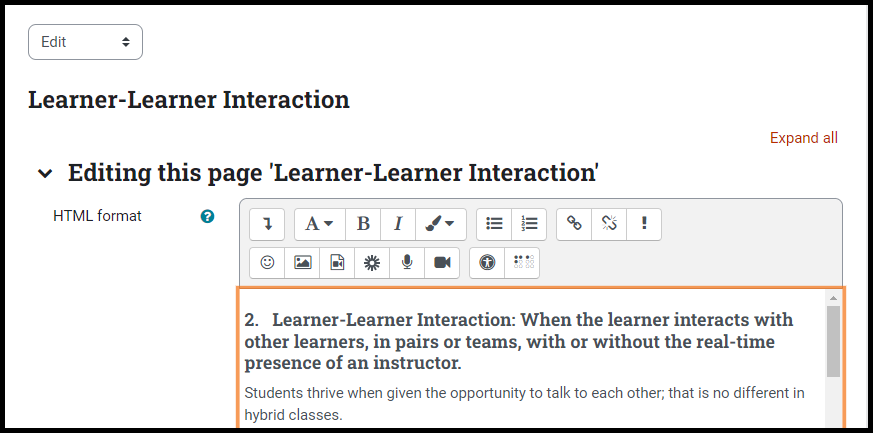
In the HTML format text box, make the changes to the existing information as desired.
-
At the bottom of the page select:
Create a new wiki page
You can create a new wiki page on the main front page or within the other wiki pages.
-
In the Edit tab, Type the new page name enclosed with double square brackets before and after the new page name.
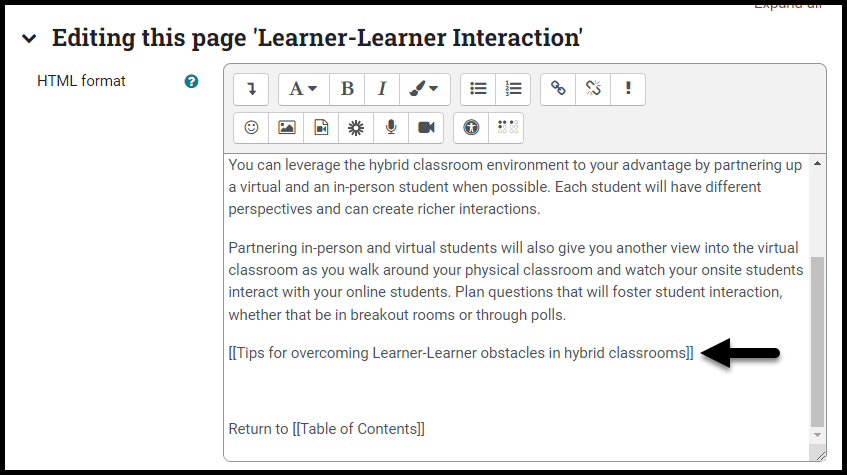
-
Select Save.
Note: This creates a blank page on the Wiki; you still have to add content.
-
To add content to the new page, select the name of the page.

Note: Wiki pages with no content will appear with a red font color and italic style
-
Select the format of the new page:
-
HTML - The HTML editor is available.
-
Creole - A common wiki markup language with a limited edit bar.
-
Nwiki - Mediawiki-like markup language with a limited edit bar.

-
At the bottom of the page, select Create page.
-
Add content to your page in the format box.
-
At the bottom of the page select:
Create a wiki link between pages
To help with navigation between wiki pages, it’s recommended to include a wiki link in pages either to the front wiki page, previous page, or related page.
-
Navigate to the specific wiki page.
-
Select the Edit option
-
Type the name of an already existing wiki page.
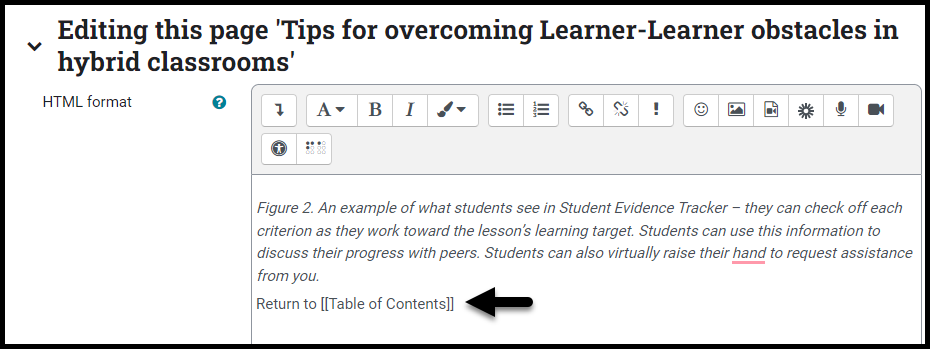
Warning: The wiki links are case sensitive and need to be spelled correctly for the relationship to be properly created.
View relationship between wiki pages
-
Navigate to the specific wiki page
-
In the drop down menu, select the Map option.
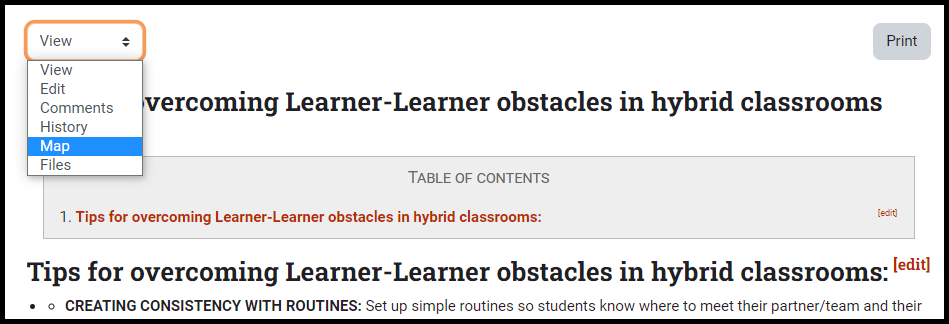
-
Choose a desired option:
-
Contributions - List of pages that you have edited.
-
Links - The wiki pages linking to this page.
-
Orphaned pages - List of pages that are not linked from other page.
-
Page Index - This wiki’s page tree.
-
Page list - Page list categorized by alphabetical order.
-
Updated pages - Recently updated wiki pages.
View wiki page history
-
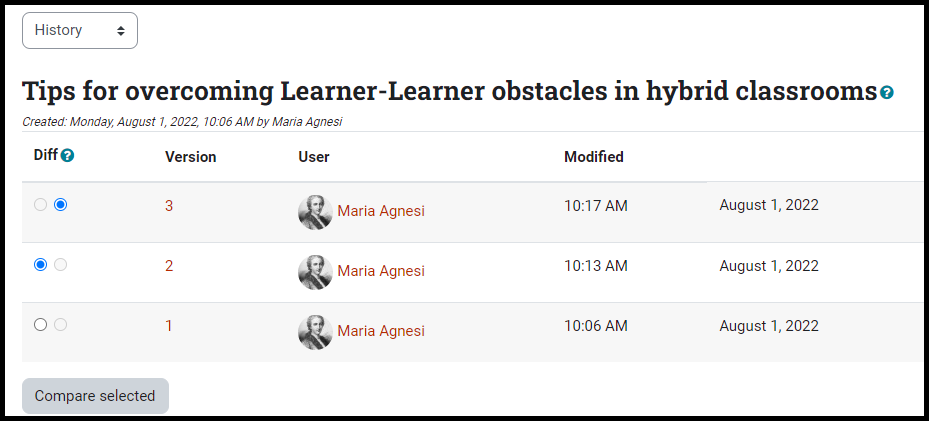
Select the History tab.

-
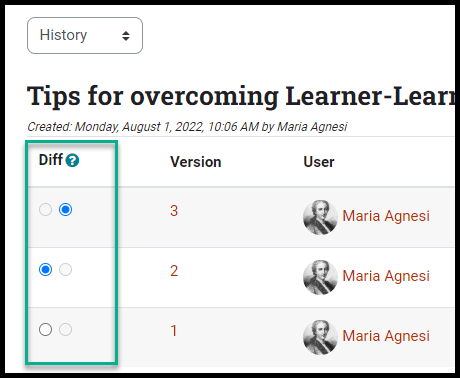
Displayed on the page will be the versions of the page and who changed them. Versions are created when changes are saved.
-
In the Diff column, select two versions and select Compare selected to see the changes that were made.
Seek Further Assistance
If you have any additional technology/computer questions, contact the IT Help Desk
If you have questions regarding this activity or your course, contact your instructor

This work was created by the Idaho State University Instructional Technology Resource Center and is licensed under a Creative Commons Attribution-NonCommercial 4.0 International License