Description
The Attendance module allows the instructor to track attendance within Moodle ISU and assign a grade in the gradebook. Instructors can determine the points for present, late, tardy, excused or other attendance criteria.
This Guide Will Help You to:
Determining the Function of the Attendance Activity
The Attendance activity is designed for an instructor to be able to take attendance during a class session, for students to be able to view their own attendance record, and to allow students to self-record their attendance.
The attendance activity can generate reports for either the entire class or for individual students. Students may also see their own attendance record if the activity is not hidden.
The optional Attendance Block allows instructors quick access to the Attendance functionality, and allows students quick access to a summary report of their own attendance.
Adding an Attendance Activity to a course
-
At the top of the course page, toggle editing on

-
Locate the week or section in which you wish to add the Attendance activity
-
Select Add an activity or resource
-
Select Attendance

For more information see, Adding an Activity in Moodle ISU [Faculty]
General
-
In the Name field, enter a name if you wish to change it from the default name - be sure to give the instance a name that indicates what it will be used for; for example, “Lab Attendance”
-
In the Description box, enter any additional information
-
If you would like this description displayed on the course page, check the Display description on course page check box
Grade
Grade - here you choose how you wish to set up the grading for the Attendance activity.
-
Grade Type:
-
None - this selection will make the activity available but will not add a grade item
-
Scale - If scale is chosen, you can then choose the scale from the drop-down menu
-
Default competence scale
-
Satisfactory
-
Separate and connected ways of knowing
Note: If none of the default scales are appropriate, you will need to create a custom scale in your gradebook for it to be available in the list. Scale values are not included in overall grade calculations. For information on using scales in the Gradebook, contact the ITRC - (208) 282-5880 or email itrc@isu.edu.
Note: The Maximum grade is for the total points possible for the entire activity and not for individual sessions.
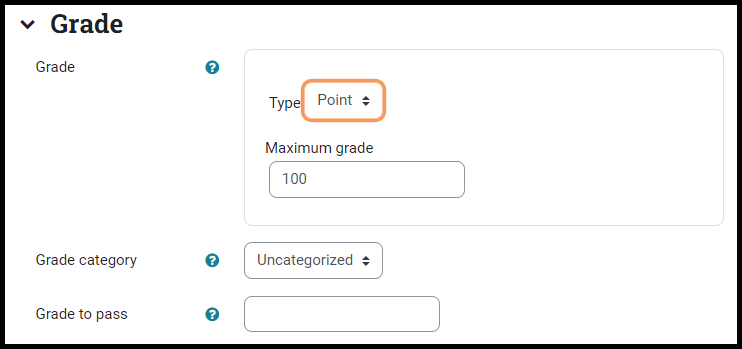
The following example illustrates an Attendance activity with a max grade of 100 points with 10 sessions. Students get 2 points for every session they attend. The total available points are scaled to match the max grade ( for example 20 = 100 points, 18 = 90 points, etc). These values are then sent to the Gradebook:

Common module settings
Choose whether to Show on course page, Hide from students, or Make available but not shown on course page. For more information see, Moodle.org: Common module settings.
Restrict Access
For more information see, Moodle.org: Restrict access
Activity completion
For more information see, Moodle.org: Activity completion settings
Save Settings
-
Select Save and display to be taken to the activity
-
Select Save and return to course to be taken to the course homepage
-
Select Cancel to not save the activity.
Adding Attendance Sessions
Once you have saved the activity, you will be able to add as many Attendance sessions as you like. For example, a 16 week course may have 16 sessions added/listed within an Attendance instance.
Adding a single session
-
Select the Attendance link in your course
-
At the top of the page, select the Add session tab to open the options
-
Choose the date and time duration for the attendance session in the Date and Time drop-down boxes

-
Add a Description if instructions for students are necessary
-
Select Add to create the session
Adding Multiple sessions
-
Follow steps 1-4 for “Adding a single session” section
Note: Set the first class meeting date in the Add session section
-
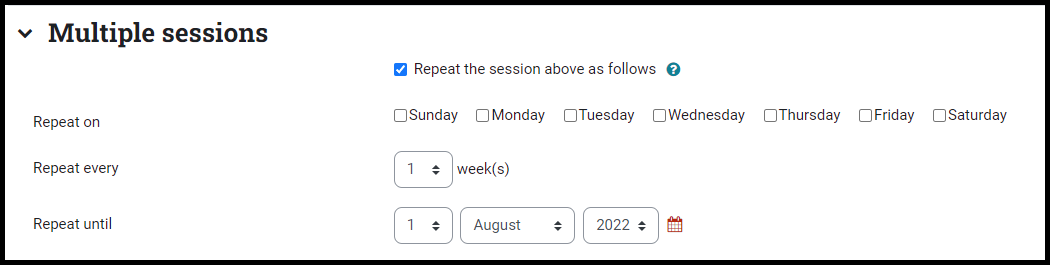
In the Multiple sessions section, Select the Repeat the sessions above as follows box to active it
-
In the Repeat on section, select each of the day(s) of the week that your class meets during a given week. For example, if your class meets every Tuesday and Thursday, you would select both of those boxes.
-
If your class meets every week, leave the Repeat every set to 1 week(s). If your course meets every other week, you would toggle the number to Repeat every 2 week(s)
-
In the Repeat until section, select the last date that your class meets
-
Select the Add button - this will create a session for each time your course meets.
[Note: After adding the sessions, you will be able to delete any sessions that are not needed due to holidays and other exceptions.]
Allowing Students to Self-Record Attendance
-
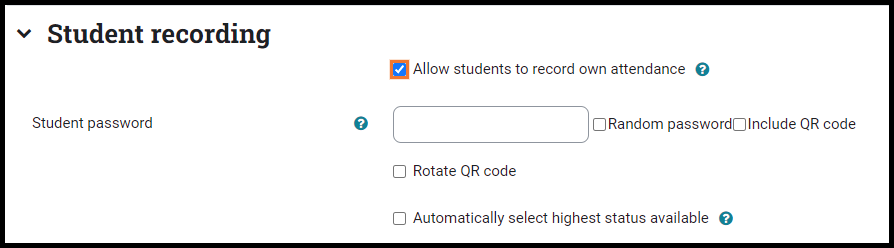
If you would like to allow students to self-record their attendance, check the Allow students to record own attendance box.
-
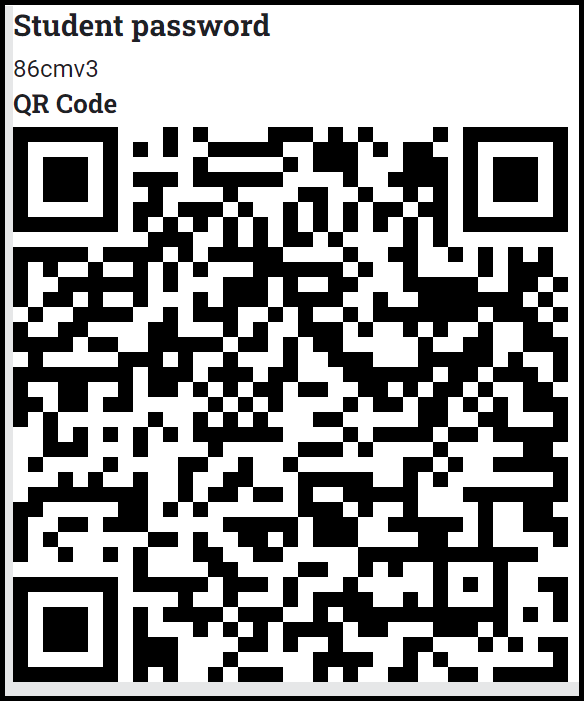
If you wish to require students to enter a password before they can self-record their attendance, enter a password in the Student password box - if empty, no password is required.
-
Each session can be assigned a unique password by selecting the Random password box. This will require the instructor to provide the randomly generated password to students for each session.
-
In addition, instructors can display a QR code containing a URL that students can scan with a mobile device which brings them directly to the page where they record their attendance, and fills in the password for them too. Then they only need to select the status “Present” to record their attendance via a mobile device.
-
To share the QR code with students, from the Sessions tab the instructor would select the Password icon

-
The QR code will open in a new browser tab that can be displayed on screen
-
In order to require a unique QR code for each session, select the Rotate QR code box.
-
If the “Automatically select” the highest status available box is selected, students will be automatically marked as present without any additional selections once they enter the session.
-
Instructors can also prevent students from taking attendance for themselves and other students by selecting Show more… and in the Prevent students sharing IP address drop-down select Yes. The other option, Specified time in minutes to release IP allows instructors to set the number of minutes that must transpire before a student is allowed to self-record using the same device.
Note: By default the Require network address option is selected which allows the IP address to be indicated in attendance reports.

Setting Attendance Grading Criteria
Once the Attendance activity has been added, it is time to set the attendance grading options.
-
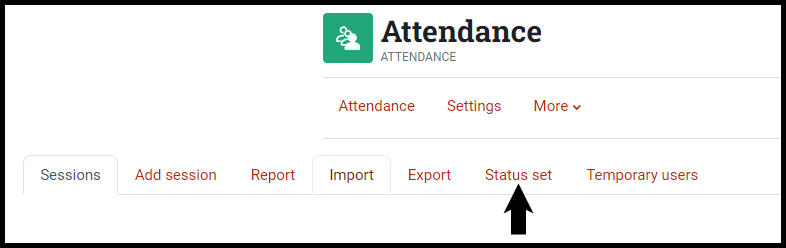
Select the Attendance activity for which you wish to set the grading criteria
-
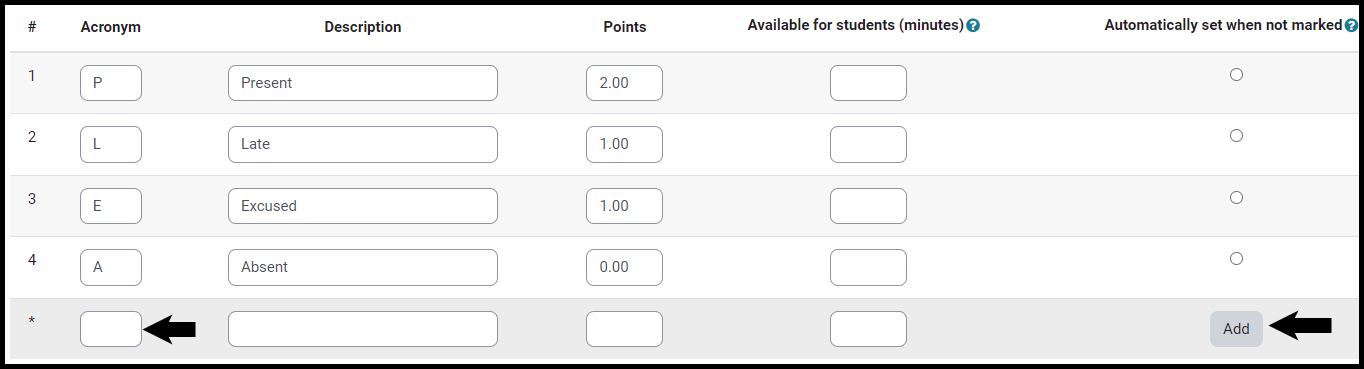
From the bar of tabs, select Status set which will display acronyms, attendance status descriptions, and grade (points) to assign. By default, the status descriptions are "Present", "Late", "Excused", and "Absent".
-
You may prefer to change the descriptions (for example, by changing "Late" to "Tardy"), and/or change the way points are counted. Once you have made changes, select the Update button to save them.
-
Additional status descriptions may be added. To do so, fill in the fifth line (indicated with *) with the acronym, description and Points and select the Add button.
-
If allowing students to self-record attendance, there are additional options to be determined:
-
The Available for students (minutes) column allows the instructor to indicate how many minutes after the start of the session that a status is available. For example, the Present status may be set to only allow students to receive a “present” grade for 15 minutes after the start of the session and after that, they would be marked as “late”. If the box is left empty, the “present” status would always be visible to students.
-
The Automatically set when not marked column allows instructors to determine what status will be assigned if students do not self-record their attendance for a given session. For example, if the button for “Absent” is selected, students who do not self-record their attendance for a session will automatically be marked as “absent”.
-
Additional options:
-
A status can be hidden by selecting the eye symbol in the Action column and/or
-
A status can be deleted by selecting the trash icon in the Action column
[Note: Be sure to select the Update button if any changes are made.]
Taking Attendance
-
Select the Attendance activity in your course.
-
Under the Sessions tab you will find the sessions that you created.
-
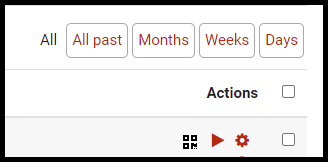
On the right side of the Sessions screen you can choose what to display
-
“All” shows all current and upcoming sessions
-
“All past” shows sessions that have already occurred
-
The sessions can also be filtered by Months, Weeks and Days
-
In the Actions column, select the solid triangle for the session you wish to take attendance

-
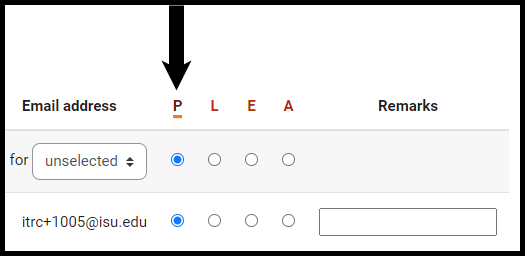
You will now see a list of all your students. Next to their name you will see columns for P (Present) L (Late), E (Excused) and Absent (A) unless you have changed the settings under the Settings tab
-
Select the appropriate attendance status for each student by selecting the dots in the status columns
-
You have the option to add Remarks by selecting the text field and typing
-
When you have finished entering attendance, select Save Attendance at the bottom of the page

Other Tips for Taking Attendance

-
Individual sessions can be edited by selecting the Gear icon to the right of the session description. This allows you to change the date, time and description.
-
When taking attendance in a session, you can quickly assign the same status to all students by selecting a status letter to the right of the Email address column. You can then modify an individual student’s status by selecting a different status dot. For example: If all but one student is present, select the P to mark all students present and then change the status for the one student to Absent.
Generating Reports
Viewing an Attendance Report
-
To generate an attendance report for viewing, select the Attendance activity and from the tab bar select Report

-
By default, there are columns displaying the First name / Last name, Email address, individual sessions, Status, number of sessions, Point value and Percentage
-
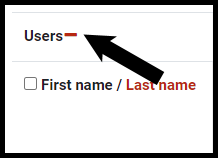
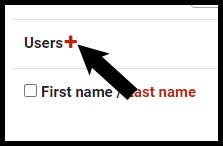
The Email addresses can be hidden by selecting the dash to the right of Users. Once that option is selected, the dash will change to a plus sign which can be selected to show the Email addresses once again.
-
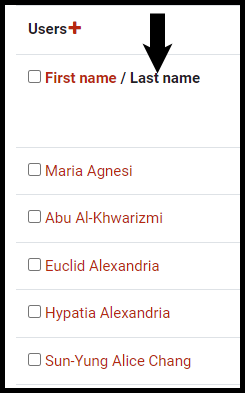
Student names can be alphabetically listed either by First name or Last name. For example, select Last name at the top of the column to list students in alphabetical order by last name
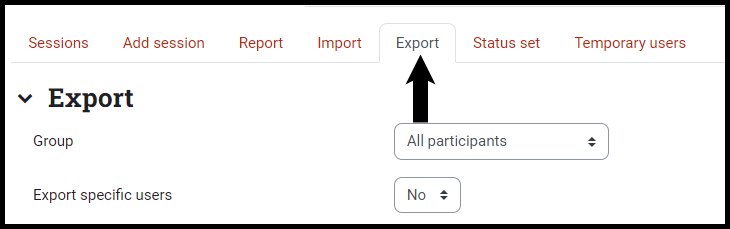
Exporting an Attendance Report
-
To export an attendance report, select Export from the tab bar. By default, all participants are exported.
-
To select specific students for the report, in the Export specific users drop-down select Yes.
Note: If the option is set to No, all students will be unselectable.
-
To select specific students to export, while holding down the Ctrl key select each student listed in the Users to export box for which you want to generate a report.
-
Other Report Options
-
Choose to identify student by Student ID and/or Email address
-
Select all sessions by checking the Yes box or unchecking the Yes box and selecting sessions in a specific start and end period
-
Choose whether or not to “Include not taken sessions”, “Include remarks” and “Include session description”.
-
Choose the Format in which you would like to export the report
-
Select OK and you will be given the option to name the report and choose the download location
Seek Further Assistance
For additional assistance, please contact the ITRC at (208) 282-5880 or itrc@isu.edu
For more information, please visit Moodle.org: Attendance activity

This work was created by the Idaho State University Instructional Technology Resource Center and is licensed under a Creative Commons Attribution-NonCommercial 4.0 International License.