Description
The Groups and Groupings options provide a way for instructors to divide the students to work together on activities, give participants access to specific content, and help organize the Gradebook and participant list.
This Guide Will Help You to:
For more information see, Creating a group
Create group shells - manually
-
In your course, select Participants on the course navigation menu
-
Open the drop-down menu and select Groups

-
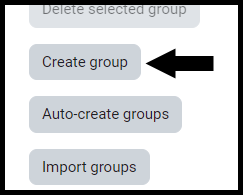
Select Create group
-
In the Group name text box, type the name of the group
-
Select Save changes
[Note: Repeat steps 3 to 5 to create additional group shells]
Assign participants to group
Once the group shell is created, you can assign participants to the group.
-
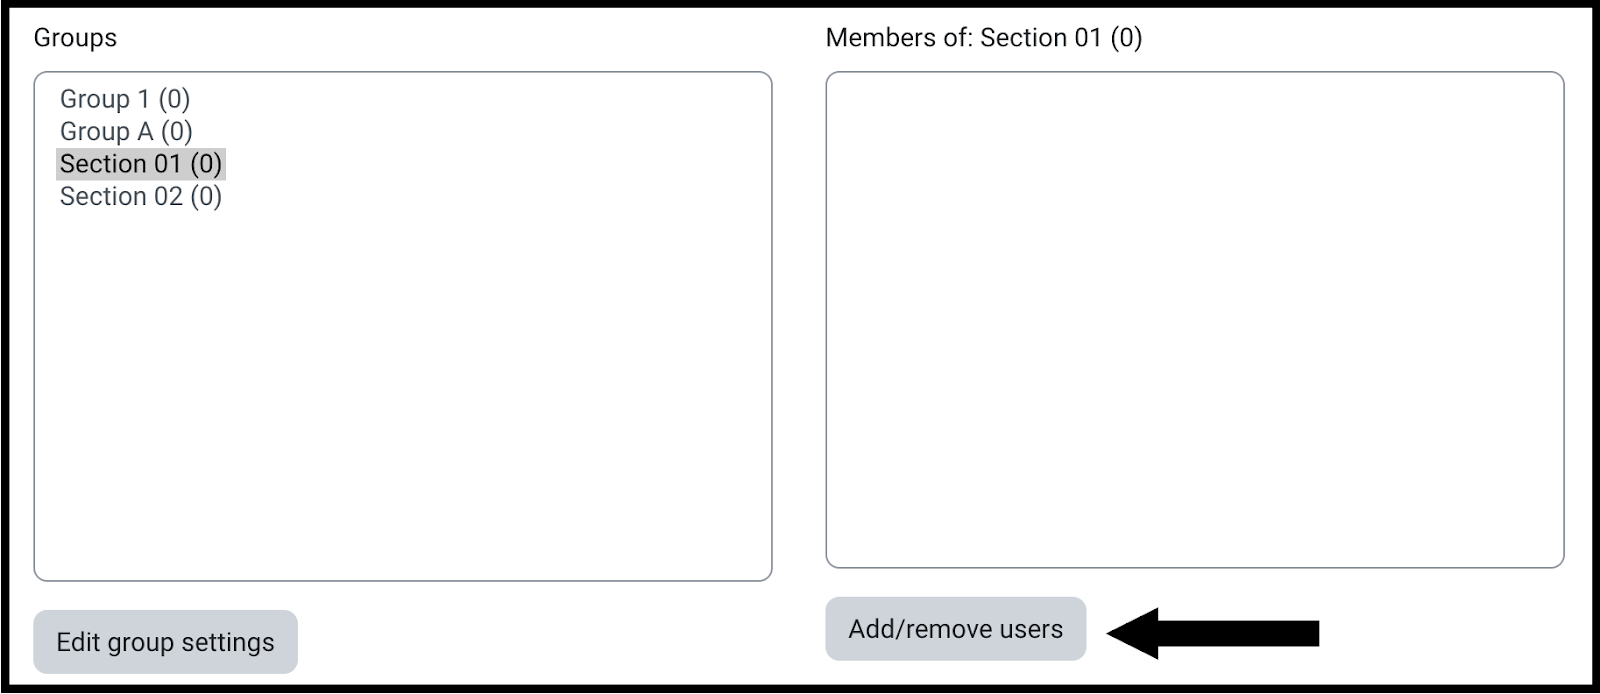
In the groups box, select a specific group
-
Select Add/remove users
-
Under Potential members box, select the participants you wish to add to a group
[Note: To select multiple participants simultaneously, you can use the ctrl+select option.]
-
Select Add
-
When complete, select Back to groups
Create groups - automatically
-
In your course, select Participants on the course navigation menu
-
Open the Users tab, select Groups.
-
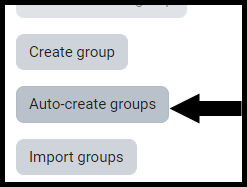
Select Auto-create groups
-
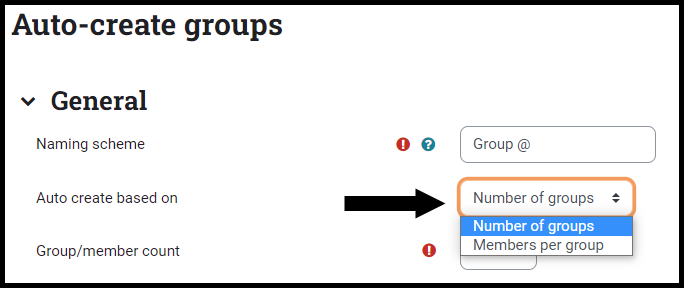
In the Naming scheme text box, Type the name and either @ or # to name the groups automatically.
-
Type in Group @ to name your groups Group A, Group B, etc.
-
Type in Group # to name your groups Group 1, Group 2, etc.
-
Type in Team @ to name your groups Team A, Team B, etc.
-
In the Auto create based on drop-down choose:
-
Number of groups - will create the number of groups specified, adding users evenly to that number of groups.
-
Members per group - will create groups with the specified number of members in them until all members are in a group.
-
Group/member count - the number of groups or number of participants in the group (depending on the Auto create based on setting)
For more information see, Auto-create groups
Create groupings
-
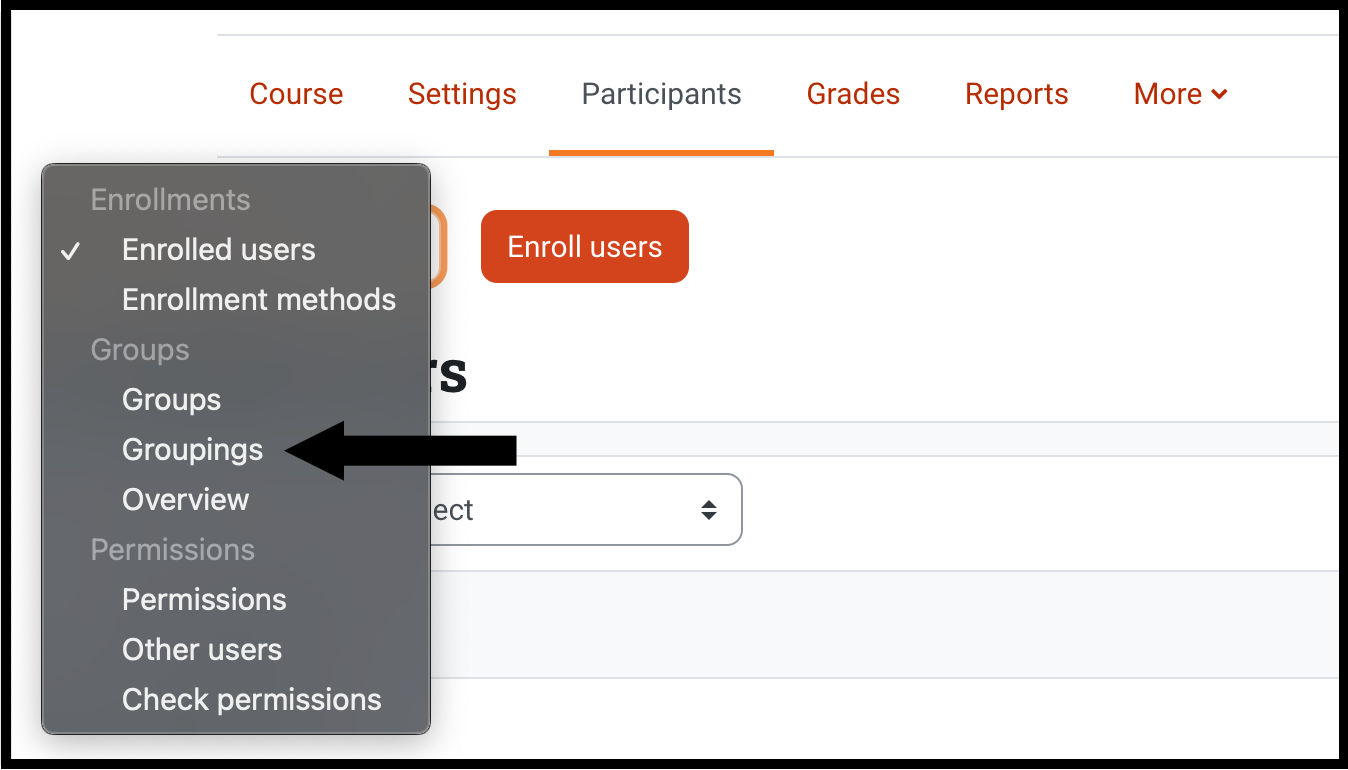
In your course, select Participants on the course navigation menu
-
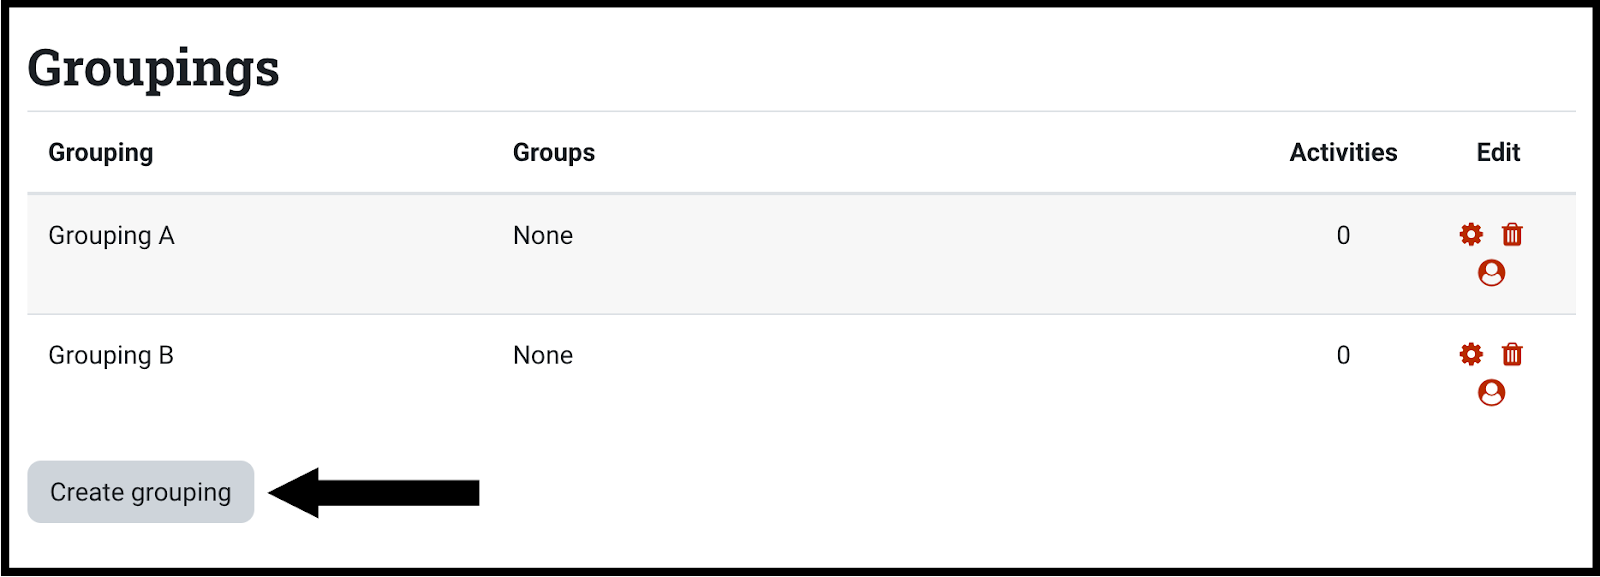
Open the drop-down menu and select Groupings
-
Select Create grouping button
-
In the Grouping name text box, type the grouping name
-
Select Save changes
Assign groups to a grouping
-
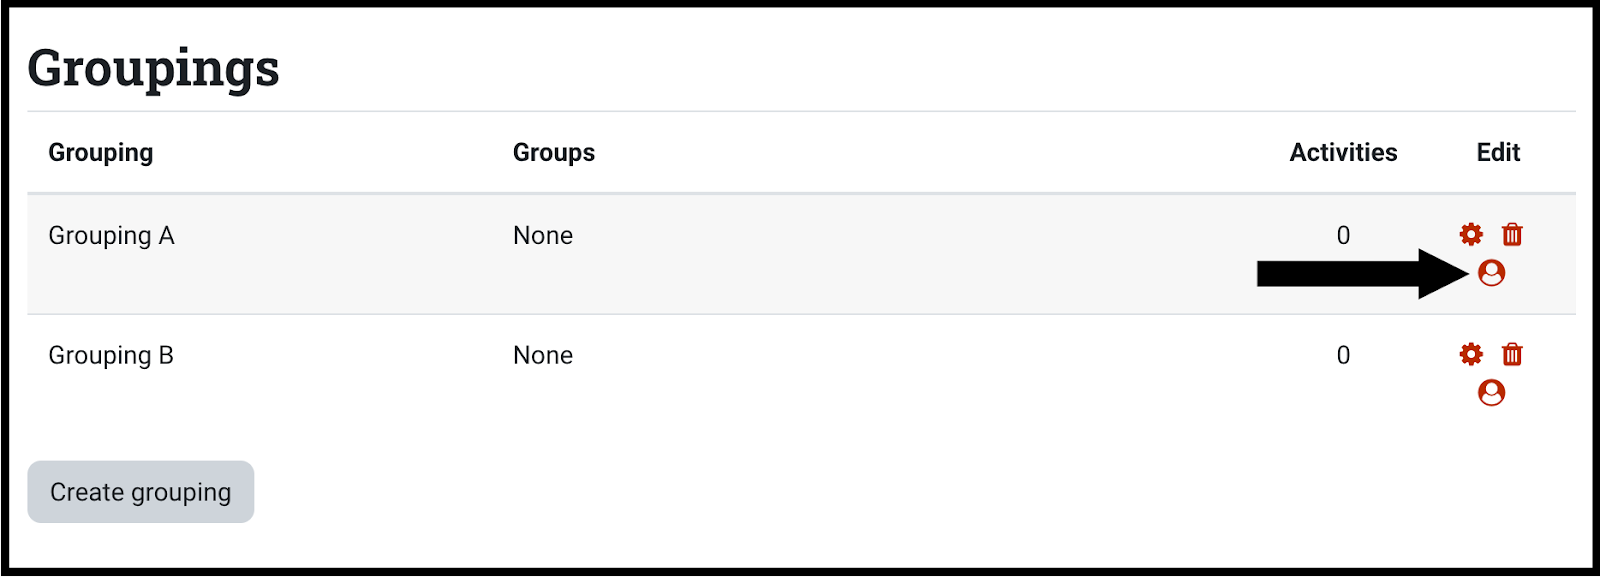
In the Groupings tab, locate the Edit column, select Show groups in the grouping icon
-
Under Potential members box, select the groups you wish to add to a grouping
[Note: To select multiple participants simultaneously, you can use the ctrl+select option.]
-
Select Add
-
At the bottom of the page, select Back to groupings button
For more information see, Groupings
Use groups / groupings
[Note: Once the groups and groupings have been created, you may apply the group mode to your entire course or a specific activity. If the group mode is defined at the course level it will be the default mode for all activities within the course - this can be changed at the activity level. The activity or resource level group mode will override the course level group mode, unless Force group mode is set to Yes.]
Apply groups / grouping to the entire course
-
In your course, select Settings on the course navigation menu
-
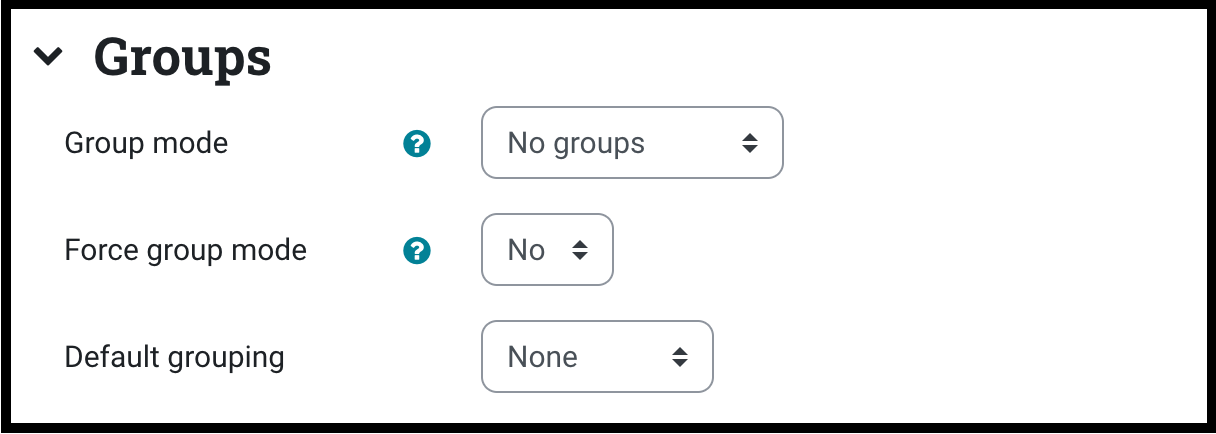
Locate the Groups section. If the section is collapsed, select on the arrow next to the section title
-
In the Group section, select one of the following:
-
No groups - At the course level all participants are in one big group
-
Separate Groups - At the course level, each group member can only see the work of other members in the same group. (A member of team 1 cannot see work from a member of team 2)
-
Visible groups - At the course level, each group member can see both work of members inside and outside of the group. (A member of team 1 can see work from a member of team 2)
-
In the Force group mode, choose:
-
No - This option will set the group mode specified above as the default group mode for activities and resources but allows the instructor to change the settings at the resource or activity level
-
Yes - This option will force every activity and resource created within the course to use the group mode defined here in the course settings, ignoring any settings within the activity or resource
-
In the Default grouping, select from a Grouping that you created
[Note: This grouping will become the default for all activities and resources if you are using groupings on a course level (this is not very common)]
-
At the bottom of the page, select Save and display
For more information, see Course settings: Groups
Apply groups / grouping to a single activity or resource
[Note: Each activity can define its own group mode (Separate groups, Visible groups, No groups). When set at the activity level, it only applies to that specific activity.]
-
In the top right of your screen, toggle editing on
-
Locate the activity or resource you would like to edit
-
To the right of the activity select Edit, then select Edit settings
-
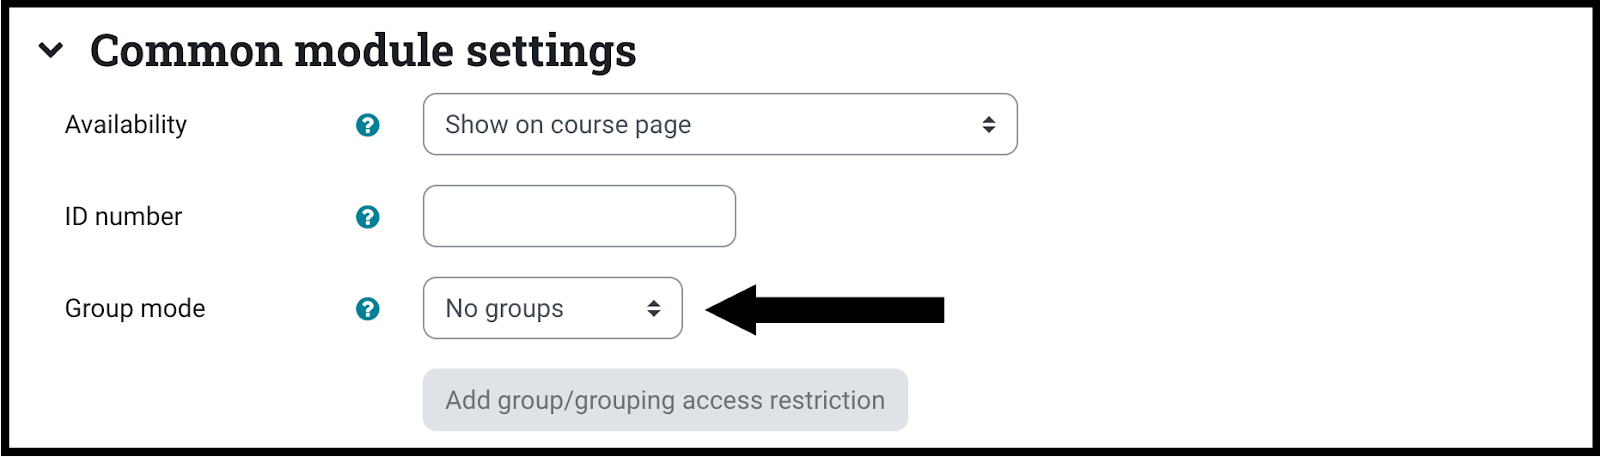
Once in the Edit settings page, locate Common module settings
-
In the Group mode drop-down select one of the following:
-
No groups - At the course activity level, all students will participate and have access as a whole class.
-
Separate Groups - At the activity level, each group member can only see the work of other members in the same group. (A member of team 1 cannot see work from a member of team 2)
-
Visible groups - At the activity level, each group member can see both works of members inside and outside of the group. (A member of team 1 can see work from a member of team 2)
[Warning: you must first create the grouping for it to show in the list.]
For more information see, Common module settings: Group mode
Save Settings
-
Select Save and display to be taken to the Lesson activity.
-
Select Save and return to course to be taken back to the course homepage.
-
Select Cancel to delete the activity and return to the course's homepage.
Seek Further Assistance
For additional assistance, please contact the ITRC at (208) 282-5880 or itrc@isu.edu
For more information, please visit:

This work was created by the Idaho State University Instructional Technology Resource Center and is licensed under a Creative Commons Attribution-NonCommercial 4.0 International License.