Introduction
This document will give you a brief overview of Moodle ISU. It will help you to locate information in the Moodle environment and to understand the functions inside of Moodle that you will see frequently.
This Guide Will Help You to:
Page layout

-
Course Navigation - These provide a quick way for the teacher to access important aspects of the course. The More link takes you to additional pages, for example: the Content and Question banks, and Course reuse page to Backup, Restore, or Import course content.
-
Course index - This is a scrollable, collapsible drawer that displays course sections and elements. As you move up and down the central course area, your location is highlighted in the Course index. Select an item in the Course index will open it up directly in the course central area. The Course index can be collapsed and expanded as a user preference.
-
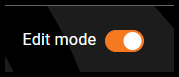
Edit mode toggle - An easy way to turn edit mode on and off.
-
Block drawer - This is not visible until you have enabled edit mode and added a block. The block drawer can be collapsed and expanded as a user preference.
-
Course sections - Here is where the learning materials are displayed. This element may be arranged in one or multiple weeks, topic, or other (non-standard) layouts.
-
Collapse all - Sections can be collapsed and expanded individually or you can use the Collapse all link to collapse them all at once.
Toggle Edit Mode on/off
As you develop your online course you will make a lot of changes to your course homepage. This section will show you how to turn editing on/off and how to add/move/delete activities and resources.
-
In the top right corner of the course homepage, Toggle Edit mode.

Note: Toggling Edit mode on will enable editing and the switch will be in the “right” position.
Adding an Activity/Resource to Your Course
-
Turn editing on.
-
Select the Week or Topic that you wish to add the activity or resource to your course.
-
In the chosen week, select Add an activity or resource.

Note: For more information on setting up an activity, see Add an Activity in Moodle [Faculty], for more information on setting up a resource, see Add a Resource in Moodle [Faculty]
Moving an activity/resource
-
Turn editing on. For more instructions, refer to the Toggle Edit Mode on/off section above.
-
Locate the activity or resource that you wish to move.
-
Hover over the activity or resource, the mouse cursor will show the Move icon to indicate that it can be moved.

-
Select and drag the selected item to its new desired location.

Note: A horizontal line will appear to help indicate where the item will be moved to.
Duplicating an activity/resource
-
Turn editing on. For more instructions, refer to the Toggle Edit Mode on/off section above.
-
Select the activity that you wish to duplicate.
-
From the Edit dropdown menu, Select Duplicate.

Note: A copy of the activity or assignment will appear directly below the original.
Frequently used icons

Three dots menu - This icon indicates additional options or sub-list of menu items
(Aka: kebab menu, three vertical dots menu)


Dropdown menus - To use the dropdown menus, select on the wording/icon or use the arrow located to the right.

Move - Use this icon to drag and drop the activity to another place on the page. Moving elements can happen in both the Course index and Course page.

Move right - When you select this icon the title of the activity will be indented slightly to the right. After you have moved an activity to the right you can move it back again by selecting the left arrow that will appear.
Configuration/Update/Edit - You can use this icon to modify the block, activity or resource selected.
Duplicate - This will allow you to make a copy of the activity/resource for the same week.
Delete - When you select this icon the activity/resource or block will be permanently deleted from your course.

Hide - To open an activity, simply select the closed eye. The eyeball with the line through it means that the students cannot see the activity/resource.

Show - By selecting on the open eye it will hide the activity/resource on the page from the students. An open eye also means that the students can see the activity/resource.

No groups - This icon indicates that there are no groups created for a particular activity.

Visible Groups - This icon means that participants can view work from participants both inside and outside their group.

Separate Groups - This icon means that participants can only view work from participants inside their single group.

Activity Completion:
Mark as done - Students can manually mark this as complete - If during the setup of the activity you have elected to allow students to mark the activity as complete, then you will see this button next to the activity.

Condition(s) are met - Activities are automatically marked complete when the student meets the specific conditions. Teachers and students will see a list of conditions next to the activity.

Help - If at any time you need help, look for this icon. When you select it you will see a basic description of the function.

Show more/Show less links- Select this button to make the advanced options available for use when setting up activities.

Expand all / Collapse all links - This option allows you to show or hide sections, similar to the ‘show more / show less’ button.

Editing - The pencil icon allows you to edit the title of the resource / activity. It’s also found on the Particent page to edit a participants role or group.
Seek Further Assistance
For additional assistance please contact, ITRC at (208) 282 5880 or itrc@isu.edu
For more information please visit, Course Homepage

This work was created by the Idaho State University Instructional Technology Resource Center and is licensed under a Creative Commons Attribution-NonCommercial 4.0 International License.