Description
Workshops are an assignment with a peer assessment component. A typical workshop is a long-term activity and can take up to several days or even weeks to complete. The workshop workflow is divided into five phases. You will manually move the workshop from phase to phase when you are ready to move on.
This Guide Will Help You to:
Create a new workshop activity
-
Toggle editing on.

-
Locate the week or section in which you wish to add the new assignment
-
Select Add an activity or resource

-
Select Workshop icon

For more information see, Adding an Activity in Moodle ISU [Faculty]
Modify the edit settings
General
-
In the Workshop name text box, Type the Workshop name. (this field is required)
-
In the Description field, Type instructions or reminders for your students.

-
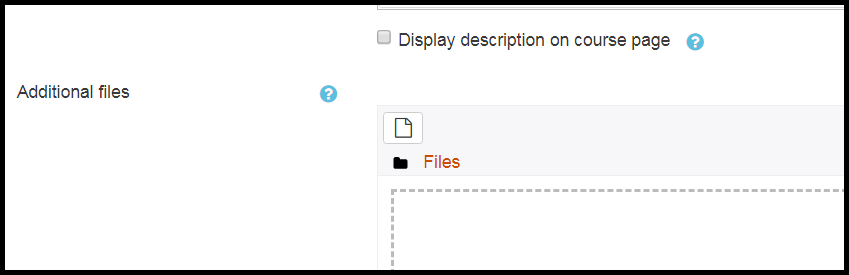
If you would like this description displayed on the course page, Check Display description on course page.
-
Use the Additional files filepicker to upload handouts, instructions, or examples.
Grading Settings
-
From the Grading strategy drop-down menu, Select which grading method you would like to use.
-
Accumulative grading: Grades and comments are given for specific aspects of the work.
-
Comments: Only comments are given during the assessment phase. No grade is given.
-
Number of errors: Comments can be given and a checklist of yes/no is given as a grade regarding specific assertions to be considered during the assignment.
-
Rubric: A rubric with specific grading requirements set by you (the instructor) is used to assign a grade.
-
From the first Grade for submission drop-down menu, Select the maximum grade for the student’s own submission grade.
-
From the second Grade for submission drop-down menu, Select the gradebook category where the grade should be placed in the gradebook. If you do not use categories in your gradebook, leave as Not categorized.

-
From the first Grade for assessment drop-down menu, Select the maximum grade for how well the student assesses others.
-
From the second Grade for assessment drop-down menu, Select the gradebook category where the grade should be placed in the gradebook. If you do not use categories in your gradebook, leave as Not categorized.

For more information, see Moodle.org: Grading settings
Submission Settings
-
In the Instructions for submission text field, Type detailed instructions to the students for submitting their work. These instructions will be shown to the the students at the beginning of the Submission Phase.

-
From the Maximum number of submission attachments drop-down menu, Select the number of files the student may need to submit.
-
From the Maximum submission attachment size drop-down menu, Select the maximum size of an individual file to be uploaded. Common file types include: .doc, .pdf, .pptx.
Note: 1 MB is generally more than sufficient for most word documents. If your students are turning in files that include pictures (i.e., Magazine layouts, PowerPoint files) you will want to increase the file size as well as discuss how to compress images.
-
To allow students to submit work after the submission deadline, Check the Allow submissions after deadline check box.
Assessment Settings

-
In the Instructions for assessment text field, Type instructions to the students for assessing their peers’ work. These instructions will be shown to the the students at the beginning of the Assessment Phase.
-
To allow students to assess their own submission and receive a grade, Check the Students may assess their own work check box.
Feedback

-
Overall feedback mode - provides a text field at the bottom of the assessment form. Reviewers can put the overall assessment of the submission there or provide additional explanations of their assessment.
-
Disabled - an Overall Feedback text box does not appear
-
Enabled and optional - an Overall Feedback text box is visible but is not required
-
Enabled and required - an Overall Feedback text box is visible and also required.
-
Maximum number of overall feedback attachments - limits the number of attachments the reviewer can attach. Common file types include: .doc, .pdf, .pptx.
-
Maximum overall feedback attachment size - limits the size of the attachment files.
-
Conclusion - displays a text to all participants at the end of the activity.
Example submissions
-
Use examples - Allows the user to assess examples without it being counted for a grade.
Note: These examples are provided by the instructor.
-
The Mode of examples assessment drop-down menu provides three options:
-
Assessment of example submission is voluntary
-
Examples must be assessed before own submission
-
Examples are available after own submission and must be assessed before peer assessment

For more information on Example submissions see, Workshop Activity: The Setup Phase - Using Examples [Faculty]
Availability
You can choose a custom open/end date for both the submission and assessment phase.
-
Check the Enable text box for each custom date.
-
Choose a desired date for the following:
-
Check the Switch to the next phase after the submission deadline option to enable that option

Common Module Settings
Choose whether to Show or Hide the Page (default is Show)
For more information see, Moodel.org: Common module settings
Restrict access
For more information see, Moodle.org: Restrict access
Activity completion
For more information see, Moodle.org Activity completion
Saving the Workshop
-
Click Save and display to view the workshop.
-
Click Save and return to course to be taken back to the main course page.
-
Click Cancel to delete the workshop.
Warning: Please note that, while you are saving the settings of the workshop, you have not yet completed the Setup Phase. Based on some of the criteria selected in creating the workshop, you will have a list of items that will need to be completed.

Note: Your next step will be to edit the Assessment Form, Workshop Activity: The Setup Phase - Editing the Assessment Forms [Faculty]
Seek Further Assistance
The following are additional workshop guides, for more information about each phase, see:
For additional assistance, please contact the ITRC at (208) 282-5880 or itrc@isu.edu
For more information, please visit Moodle.org:

This work was created by the Idaho State University Instructional Technology Resource Center and is licensed under a Creative Commons Attribution-NonCommercial 4.0 International License