Description
During the Submission Phase, students will submit their work according to the instructions and criteria established in the Setup Phase and instructors will allocate the submissions for peer review. Before moving to the Submission Phase, make sure all the settings are correct. There are many options in creating a workshop.
This Guide Will Help You to:
Move to the Submission Phase
Once you move to the Submission Phase, students will be able to begin submitting their work. If you have set a specific start/end date during the Setup Phase, submissions will be limited to those dates. If you would like to set a submission window, you can do that in the Availability section of the workshop settings.
For more information, see Workshop Activity: The Setup Phase - Creating a Workshop [Faculty]. Make sure that all the settings are correct before moving to the Submission Phase.
In the Submission Phase, when students click on the name of the workshop, they will see the Workshop Planner with a list of the tasks they need to complete and reminders of submission due dates (if you have set a due date). During the Submission Phase, students are able to edit their submissions.
Warning: The workshop MUST be in the Submission Phase for students to submit their work (even if you have set a submission window using the Availability section within the settings).
Do the following to move to the Submission Phase:
-
Click on the name of the Workshop.
-
In the Workshop Planner, beneath the Submission Phase title, Click the circle icon to begin the phase.

-
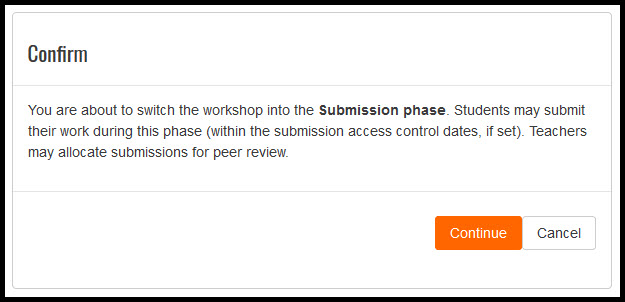
You will see a message that describes what can be done during the Submission Phase.
-
Click Continue to move to the Submission Phase.
Allocate Submissions to Students
Warning: you will need to wait for all participants to submit their assignment to keep the process running smoothly, just one late/absent submission can be tedious to fix
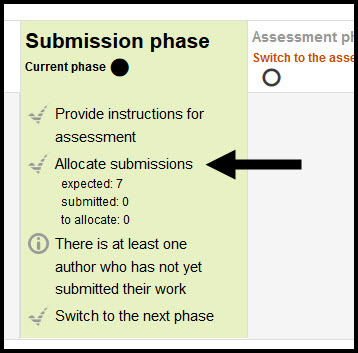
After students have submitted their work, you will need to distribute the submissions to other students for the Assessment Phase. In the Workshop Planner, you will see the number of students in your class next to Expected. As students submit their work, you will see the number of submissions next to Submitted. You can also see a list of the submissions below the Workshop Planner.
Note: It is best to have an odd number of reviewers for the Grade for assessment to be calculated. Instructors assessments are counted, if the submissions have been allocated to the instructor.
-
Click on the name of the workshop.
-
In the Workshop Planner, you will see a list of tasks to complete in the Submission Phase.
-
Click Allocate submissions.
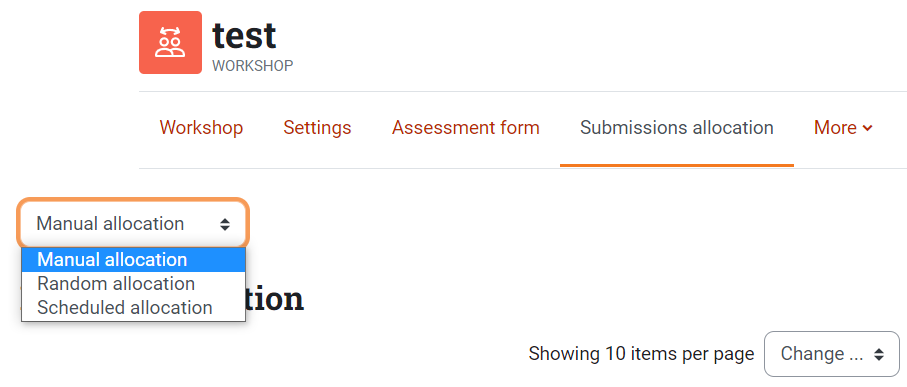
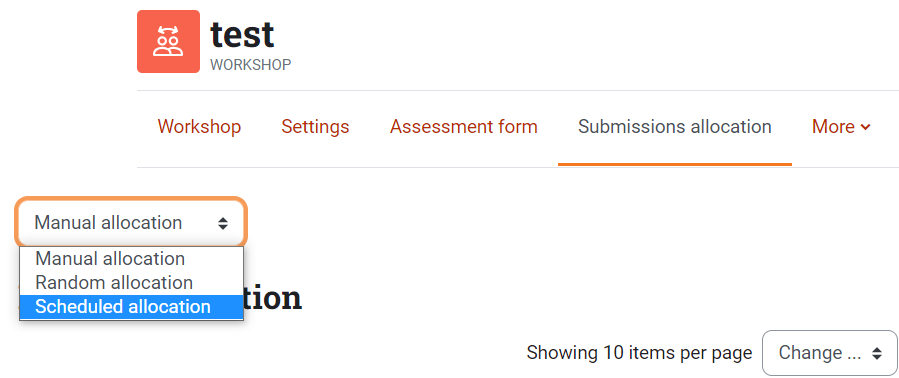
You can allocate the submissions manually or randomly.
Manual Allocation
In Manual Allocation, you will match pairs of students to review each other’s submissions. i.e., if you assign Mark to review Beth’s submission, Beth will be assigned to review Mark’s submission. You can assign as many reviewers and reviewees as there are students in the class.
Warning: Students will need to add a submission before they can be allocated.
-
Click on the Manual Allocation tab.
-
Choose to either allocate by Participant is Reviewed by or Participant is reviewer of
-
In the Participant is reviewed by column, use the dropdown menu to designate who will review the submission of the person listed in the Participant column.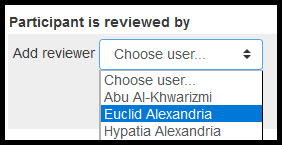
-
In the Participant is reviewer of column, use the dropdown menu to designate who will be reviewed by the person listed in the Participant column.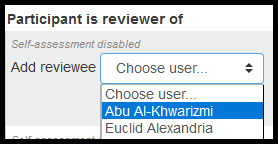
-
You will get a confirmation screen showing the matched students with the most recent match highlighted.

-
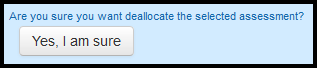
If this is not a good match, you can Click the Trash icon to remove the allocation.
-
Click Show all participants to return to the list of students.
Note: It is possible to assign a submission to a student who has not submitted yet. The confirmation screen and the list of participants indicates No submission found for this user.
-
Repeat steps until you have the correct number of reviewers and reviewees.
Note: Remember to check all your students using the Page and Next links at the top and bottom of the list.
Random Allocation
-
Click the Random allocation tab.

-
In the first Number of reviews dropdown menu, Select the number of reviews.
-
In the second Number of reviews dropdown menu, Select whether the number is per submission or per reviewer.
-
In the Remove current allocations checkbox, you can check the box or leave it blank. (Checking the box will delete any manual allocations.)
Note: You can delete all the allocations, both manual and random, by selecting 0 in the Number of reviews dropdown menu and checking the Remove current allocations checkbox.
-
In the Participants can assess without having submitted anything checkbox, you can check the box or leave it blank. (Checking the box will allow a student to review without having submitted work.)
Note: The following option is only available if you selected Students may assess their own work in the workshop settings.
-
In the Add self-assessments checkbox, you can check the box or leave it blank. (Checking the box will allow a student to review his or her own work.)
-
Click Save changes to allocate the submissions.
-
You will see a screen with a summary of the random allocations.
-
Scroll down to the bottom of the page.
-
Click Continue.
-
You will see the random allocation screen.
-
Click the Manual Allocation tab to see the allocated submissions.
For more information see, Moodle.org: Random Allocation
Scheduled Allocation
-
Click the Scheduled allocation tab.
-
In Scheduled Allocation Settings category, click the checkbox to enable scheduled allocation.
Note: When enabled, the scheduled allocation method will automatically allocate submissions for the assessment at the end of the submission phase. The end of the phase can be defined in the workshop setting “submission deadline”.
-
Allocation settings is similar to Random Allocation Settings.
-
In the first Number of reviews dropdown menu, Select the number of reviews.
-
In the second Number of reviews dropdown menu, Select whether the number is per submission or per reviewer.
-
In the Remove current allocations checkbox, you can check the box or leave it blank. (Checking the box will delete any manual allocations.)
Note: You can delete all the allocations, both manual and random, by selecting 0 in the Number of reviews dropdown menu and checking the Remove current allocations checkbox.
-
In the Participants can assess without having submitted anything checkbox, you can check the box or leave it blank. (Checking the box will allow a student to review without having submitted work.)
Note: The following option is only available if you selected Students may assess their own work in the workshop settings.
-
In the Add self-assessments checkbox, you can check the box or leave it blank. (Checking the box will allow a student to review his or her own work.)
-
Click Save changes to allocate the submissions.
-
You will see a screen with a summary of the random allocations.
-
Scroll down to the bottom of the page.
-
Click Continue.
-
You will see the random allocation screen.
-
Click the Manual Allocation tab to see the allocated submissions.
Set the Assessment to be Anonymous
-
Click on the name of the workshop.
-
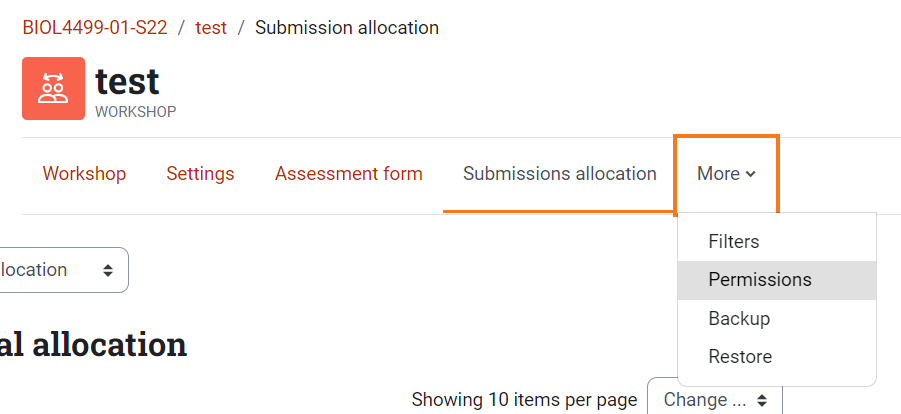
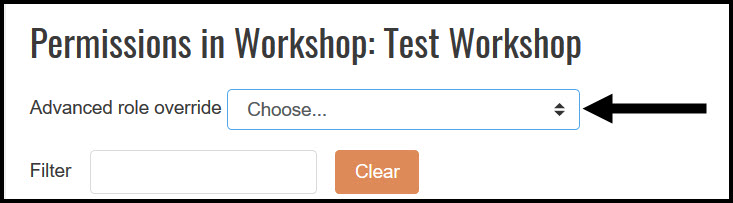
In the Workshop activity menu, select Permissions.
-
From the Advanced role override dropdown menu, select Student. This change will affect all the individuals with the role of Student.
Note: By default students are enrolled in your course in the Student role. If anyone has been added in the Student (Manual Enrollment) role, you will need to change the permissions for both roles.
-
You will see a list of the Capabilities that the Student role is allowed.
-
Scroll down to View author names (mod/workshop:viewauthornames).
-
In the Permission column, Click the radio button above Prevent.

Note: Prevent will make the workshop anonymous. Do not use Prohibit as it may have some unintended consequences.
-
Scroll to the bottom of the page.
-
Click Save changes.
Note: When students submit their work, Moodle ISU will not show the name of the file. When students submit their work, there is a Title field. If a student uses his/her name in the Title field, the reviewer will see the student’s name. In addition, the assessment will not be anonymous if the student includes their name within the body or heading of the file.
Once all the students have submitted their work and you have allocated the submissions, you are ready to move to the Assessment Phase.
For information on the Assessment Phase, see Workshop Activity: The Assessment Phase [Faculty]
Seek Further Assistance
The following are additional workshop guides, for more information about each phase, see:
For additional assistance please contact, ITRC at (208) 282 5880 or itrc@isu.edu
For more information please visit, Moodle.org:

This work was created by the Idaho State University Instructional Technology Resource Center and is licensed under a Creative Commons Attribution-NonCommercial 4.0 International License